A person sailing in a boat who know swimming will always be in a safe side comparatively with other person who doesn't know how to swim.
Guys, we all know that we are using Cloud based platforms like AWS Athena for working on HIVE these days, but it is very important to understand the basics of HIVE, like what is HIVE, how to install it, what are the installation modes, HIVE tables, concepts involved in it to format the data, serDe etc.,
Most of the time, already implemented HIVE serDe's are good enough for practical use cases but what if we land into a situation where we have to write our own serDe in Java? Hence, it is good to have this knowledge for a Data engineer though we are using UI in cloud to perform same activities. Hence let's learn HIVE in depth and have this knowledge with us to sail further.
What is HIVE ?
Apache Hive is a data warehouse software project. It is built on top of Apache Hadoop for providing data query and analysis. Hive gives an SQL-like interface to query data stored in various databases and file systems that integrate with Hadoop. Traditional SQL queries must be implemented in the MapReduce Java API to execute SQL applications and queries over distributed data.
The Apache HIVE is a distributed, fault-tolerant data warehouse system that enables analytics at a massive scale and facilitates reading, writing, and managing petabytes of data residing in distributed storage using SQL.
- Generally, HIVE is built on the top of HDFS to process data using SQL type of syntax instead of writing Map Reduce programming in Java
- It used HIVE query language, HQL(kind of SQL syntax)
- It is a data warehouse system(it is not Database)
- It reads, writes data to/from distributed environments
- It can deal with huge amount of data
- HIVE is not designed for transactions(OLAP not OLTP)
HIVE installation(Bare metal/In-Premises) :
- We need Hadoop, and one RBMS(MySQL/Derby/Teradata etc.,) before installing HIVE
- Because HIVE doesn't have any internal storage
- It will store actual data in HDFS and schema in RDBMS(meta store)
- Meta store is nothing but information about database, tables, columns, functions etc.,
Why they built like that to have data at one place and schema information in a different place ?
Let's say we have a table in a RDBMS(MySQL) with name arun1, we re-named it to arun2 and now the table name changed from arun1 to arun2. But in the background, it won't rename it, it will just create another table with arun2, there is no concept called update in the software world. It is just a MYTH, we will be under impression that it got updated but what's really happening is, a new table will be created. Having this knowledge, let's understand that HDFS won't allow any updates and HIVE doesn't have a storage. This is the reason we are keeping meta store information in a RDBMS rather than keeping it in HDFS. Only data/records will be stored in HDFS.
As per above image, we have 2 types of setup in HIVE:
- Local/Internal metastore DB
- Remote/External metastore DB (recommended way even for development)
- Hadoop have 3 ways of installation
- Local mode(dev)
- Psuedo mode(dev)
- Cluster mode(prod)
- Difference between Local/Internal MSDB & Remote/External MSDB is as shown in below image
- Below 2 images are 2 different Hadoop environments, we have 3 Data Nodes(DN's) available in each of them.
- Left side, on Local/Internal metastore DB, metastore DB is installed on each machine locally
- Right side, on Remote/External metastore DB, metastore DB is installed at a common location
- Lets say, we created a table T1 on first data node & T2 on second data node in Local/Internal metastore DB, as they are locally installed each data node doesn't have information about the metastore or tables available in other data node
- But in Remote/External metastore DB, metastore DB is installed at a common place, and entire metastore information is known to all data nodes in HDFS. Hence it is recommended to use this mode even for development purpose.
- In production, must and should we need external approach
- Understand that we will store maximum in MB's in metastore DB. Hence RBMS is enough, high end configuration databases are not required here.
- Large amounts of actual data will be stored in HDFS in Hadoop.
- Embedded Derby is a programmatical way of running the database, physically they don't exists, through some programs we can insert, delete data etc.,
Actual installation process will start from here :
Note : I have installed VMware in my windows laptop, installed Ubuntu(Linux flavor) on the top of to install Hadoop. We need Hadoop and one relational database to install HIVE.
Use below command to confirm the version of installed Linux :
orienit@orienit:~$ cat /etc/os-release
PRETTY_NAME="Ubuntu 22.04.3 LTS"
NAME="Ubuntu"
VERSION_ID="22.04"
VERSION="22.04.3 LTS (Jammy Jellyfish)"
VERSION_CODENAME=jammy
ID=ubuntu
ID_LIKE=debian
HOME_URL="https://www.ubuntu.com/"
SUPPORT_URL="https://help.ubuntu.com/"
BUG_REPORT_URL="https://bugs.launchpad.net/ubuntu/"
PRIVACY_POLICY_URL="https://www.ubuntu.com/legal/terms-and-policies/privacy-policy"
UBUNTU_CODENAME=jammy
orienit@orienit:~$
Command to start Hadoop :
orienit@orienit:~$ start-all.sh
WARNING: Attempting to start all Apache Hadoop daemons as orienit in 10 seconds.
WARNING: This is not a recommended production deployment configuration.
WARNING: Use CTRL-C to abort.
Starting namenodes on [localhost]
Starting datanodes
Starting secondary namenodes [orienit]
Starting resourcemanager
Starting nodemanagers
orienit@orienit:~$
Use ''jps" command to see if Hadoop is running :
orienit@orienit:~$ jps
3459 ResourceManager
3206 SecondaryNameNode
2887 NameNode
3017 DataNode
3579 NodeManager
6894 Jps
Use below command to confirm relational database installation :
orienit@orienit:~$ mysql -u root -p
Enter password:
Welcome to the MySQL monitor. Commands end with ; or \g.
Your MySQL connection id is 29
Server version: 8.0.39-0ubuntu0.22.04.1 (Ubuntu)
Copyright (c) 2000, 2024, Oracle and/or its affiliates.
Oracle is a registered trademark of Oracle Corporation and/or its
affiliates. Other names may be trademarks of their respective
owners.
Type 'help;' or '\h' for help. Type '\c' to clear the current input statement.
mysql>
Command to connect to HIVE :
orienit@orienit:~$ hive
SLF4J: Class path contains multiple SLF4J bindings.
SLF4J: Found binding in [jar:file:/home/orienit/work/apache-hive-3.1.3-bin/lib/log4j-slf4j-impl-2.17.1.jar!/org/slf4j/impl/StaticLoggerBinder.class]
SLF4J: Found binding in [jar:file:/home/orienit/work/hadoop-3.4.0/share/hadoop/common/lib/slf4j-reload4j-1.7.36.jar!/org/slf4j/impl/StaticLoggerBinder.class]
SLF4J: See http://www.slf4j.org/codes.html#multiple_bindings for an explanation.
SLF4J: Actual binding is of type [org.apache.logging.slf4j.Log4jLoggerFactory]
Hive Session ID = debad87f-62d7-4ea2-bbb3-3d67a4dd9b0c
Logging initialized using configuration in jar:file:/home/orienit/work/apache-hive-3.1.3-bin/lib/hive-common-3.1.3.jar!/hive-log4j2.properties Async: true
Hive-on-MR is deprecated in Hive 2 and may not be available in the future versions. Consider using a different execution engine (i.e. spark, tez) or using Hive 1.X releases.
Hive Session ID = 662e36b5-685f-45e5-acd7-13eb47f18dc4
hive>
Below are the default databases in mySQL :
mysql> show databases;
+--------------------+
| Database |
+--------------------+
| information_schema |
| mysql |
| performance_schema |
| sys |
+--------------------+
4 rows in set (0.00 sec)
So, it is confirmed that Hadoop, MySQL is installed. Now, HIVE installation is pretty easy.
- Download HIVE from Apache website : https://dlcdn.apache.org/hive/
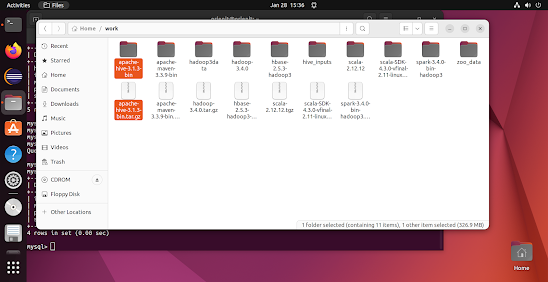
- Copy downloaded apache-hive-3.1.3-bin.tar.gz file into work directory /home/orienit/work Here /home/orienit is my user location and /work is my working directory for Hadoop
- Now extract downloaded folder in the same location as shown in above screenshot
- Update '~/.bashrc' file with below changes (copy paste below lines in bashrc file)
Command :
orienit@orienit:~$ gedit ~/.bashrc
export HIVE_HOME=/home/orienit/work/apache-hive-3.1.3-bin
export PATH=$HIVE_HOME/bin:$PATH
- Save and close the terminal and open a new terminal
- Use below command to confirm HIVE version
orienit@orienit:~$ echo $HIVE_HOME
/home/orienit/work/apache-hive-3.1.3-bin
- copy 'mysql-connector-j-8.0.33.jar and guava-27.0-jre.jar' jar files into '$HIVE_HOME/lib' folder (mysql connector is to connect to RBMS(metastore) jar and guava jar is specific to this HIVE version due to some bug - it is for serialization purpose to transfer data in network)
- Copy 'hive-site.xml' in '$HIVE_HOME/conf' folder as shown in below screenshot
Below are the contents of hive-site.xml :
<?xml version="1.0"?>
<?xml-stylesheet type="text/xsl" href="configuration.xsl"?>
<configuration>
<property>
<name>hive.metastore.warehouse.dir</name>
<value>/home/orienit/work/warehouse</value>
</property>
<property>
<name>javax.jdo.option.ConnectionURL</name>
<value>jdbc:mysql://localhost:3306/hive3_mysql_db?createDatabaseIfNotExist=true&useSSL=false</value>
</property>
<property>
<name>javax.jdo.option.ConnectionDriverName</name>
<value>com.mysql.cj.jdbc.Driver</value>
</property>
<property>
<name>javax.jdo.option.ConnectionUserName</name>
<value>root</value>
</property>
<property>
<name>javax.jdo.option.ConnectionPassword</name>
<value>XXXXX</value>
</property>
<property>
<name>hive.metastore.schema.verification</name>
<value>false</value>
</property>
</configuration>
- hive.metastore.warehouse.dir is for the HDFS location where actual data is stored
- javax.jdo.option.ConnectionURL is for the connection URL to connect to mySQL
- javax.jdo.option.ConnectionDriverName is for driver class name
- We need to mention user name and password to connect to RDBMS(mySQL in this case
Create metastore DB : One time during first time installation
schematool --dbType mysql --initSchema
Once we executed above command, it will create database hive3_mysql_db with default tables required to work with HIVE
mysql> show databases;
+--------------------+
| Database |
+--------------------+
| hive3_mysql_db |
| information_schema |
| mysql |
| performance_schema |
| sys |
+--------------------+
5 rows in set (0.00 sec)
mysql> use hive3_mysql_db;
Reading table information for completion of table and column names
You can turn off this feature to get a quicker startup with -A
Database changed
mysql>
mysql> show tables;
+-------------------------------+
| Tables_in_hive3_mysql_db |
+-------------------------------+
| AUX_TABLE |
| BUCKETING_COLS |
| CDS |
| COLUMNS_V2 |
| COMPACTION_QUEUE |
| COMPLETED_COMPACTIONS |
| COMPLETED_TXN_COMPONENTS |
| CTLGS |
| DATABASE_PARAMS |
| DBS |
| DB_PRIVS |
| DELEGATION_TOKENS |
| FUNCS |
| FUNC_RU |
| GLOBAL_PRIVS |
| HIVE_LOCKS |
| IDXS |
| INDEX_PARAMS |
| I_SCHEMA |
| KEY_CONSTRAINTS |
| MASTER_KEYS |
| MATERIALIZATION_REBUILD_LOCKS |
| METASTORE_DB_PROPERTIES |
| MIN_HISTORY_LEVEL |
| MV_CREATION_METADATA |
| MV_TABLES_USED |
| NEXT_COMPACTION_QUEUE_ID |
| NEXT_LOCK_ID |
| NEXT_TXN_ID |
| NEXT_WRITE_ID |
| NOTIFICATION_LOG |
| NOTIFICATION_SEQUENCE |
| NUCLEUS_TABLES |
| PARTITIONS |
| PARTITION_EVENTS |
| PARTITION_KEYS |
| PARTITION_KEY_VALS |
| PARTITION_PARAMS |
| PART_COL_PRIVS |
| PART_COL_STATS |
| PART_PRIVS |
| REPL_TXN_MAP |
| ROLES |
| ROLE_MAP |
| RUNTIME_STATS |
| SCHEMA_VERSION |
| SDS |
| SD_PARAMS |
| SEQUENCE_TABLE |
| SERDES |
| SERDE_PARAMS |
| SKEWED_COL_NAMES |
| SKEWED_COL_VALUE_LOC_MAP |
| SKEWED_STRING_LIST |
| SKEWED_STRING_LIST_VALUES |
| SKEWED_VALUES |
| SORT_COLS |
| TABLE_PARAMS |
| TAB_COL_STATS |
| TBLS |
| TBL_COL_PRIVS |
| TBL_PRIVS |
| TXNS |
| TXN_COMPONENTS |
| TXN_TO_WRITE_ID |
| TYPES |
| TYPE_FIELDS |
| VERSION |
| WM_MAPPING |
| WM_POOL |
| WM_POOL_TO_TRIGGER |
| WM_RESOURCEPLAN |
| WM_TRIGGER |
| WRITE_SET |
+-------------------------------+
74 rows in set (0.00 sec)
HIVE commands to enter, exit :
hive start command : hive
hive stop command : exit;
hive verify command : show databases;
Finally it should show as below when you type show datatypes in HIVE prompt :
> show databases;
OK
default
Time taken: 1.493 seconds, Fetched: 1 row(s)
You should see above output to confirm that HIVE installation is succeeded.
Let's create a simple database and see how it work.
Before creating database, use below command and see what DBS table inside hive3_mysql_db DB is having :
mysql> select * from hive3_mysql_db.DBS;
+-------+-----------------------+---------------------------------------------------+---------+------------+------------+-----------+
| DB_ID | DESC | DB_LOCATION_URI | NAME | OWNER_NAME | OWNER_TYPE | CTLG_NAME |
+-------+-----------------------+---------------------------------------------------+---------+------------+------------+-----------+
| 1 | Default Hive database | hdfs://localhost:8020/home/orienit/work/warehouse | default | public | ROLE | hive |
+-------+-----------------------+---------------------------------------------------+---------+------------+------------+-----------+
1 row in set (0.00 sec)
> create database test1;
OK
Time taken: 1.672 seconds
hive> create database test2;
OK
Time taken: 0.192 seconds
hive>
> show databases;
OK
default
test1
test2
Time taken: 0.695 seconds, Fetched: 3 row(s)
mysql> select * from hive3_mysql_db.DBS;
+-------+-----------------------+------------------------------------------------------------+---------+------------+------------+-----------+
| DB_ID | DESC | DB_LOCATION_URI | NAME | OWNER_NAME | OWNER_TYPE | CTLG_NAME |
+-------+-----------------------+------------------------------------------------------------+---------+------------+------------+-----------+
| 1 | Default Hive database | hdfs://localhost:8020/home/orienit/work/warehouse | default | public | ROLE | hive |
| 6 | NULL | hdfs://localhost:8020/home/orienit/work/warehouse/test1.db | test1 | orienit | USER | hive |
| 7 | NULL | hdfs://localhost:8020/home/orienit/work/warehouse/test2.db | test2 | orienit | USER | hive |
+-------+-----------------------+------------------------------------------------------------+---------+------------+------------+-----------+
3 rows in set (0.00 sec)
Observe that MySQL updated this information inside metastore DB hive3_mysql_db inside DBS table.
To see same databases via browser :
http://localhost:9870/explorer.html#/home/orienit/work/warehouse (this is the warehouse directory that we mentioned in hive-site.xml)
HIVE installation is completed.
This is just HIVE installation, we need to learn how to create HIVE tables and optimize them, how to balance load in HIVE using bucketization techniques, how to write UDFs, temporary and permanent functions, how to execute hive queries in production by creating .hql files, HIVE joins etc.,
Let's see how to deal above things in coming blogs. Have a great day!
Arun Mathe
Gmail ID : arunkumar.mathe@gmail.com


Comments
Post a Comment